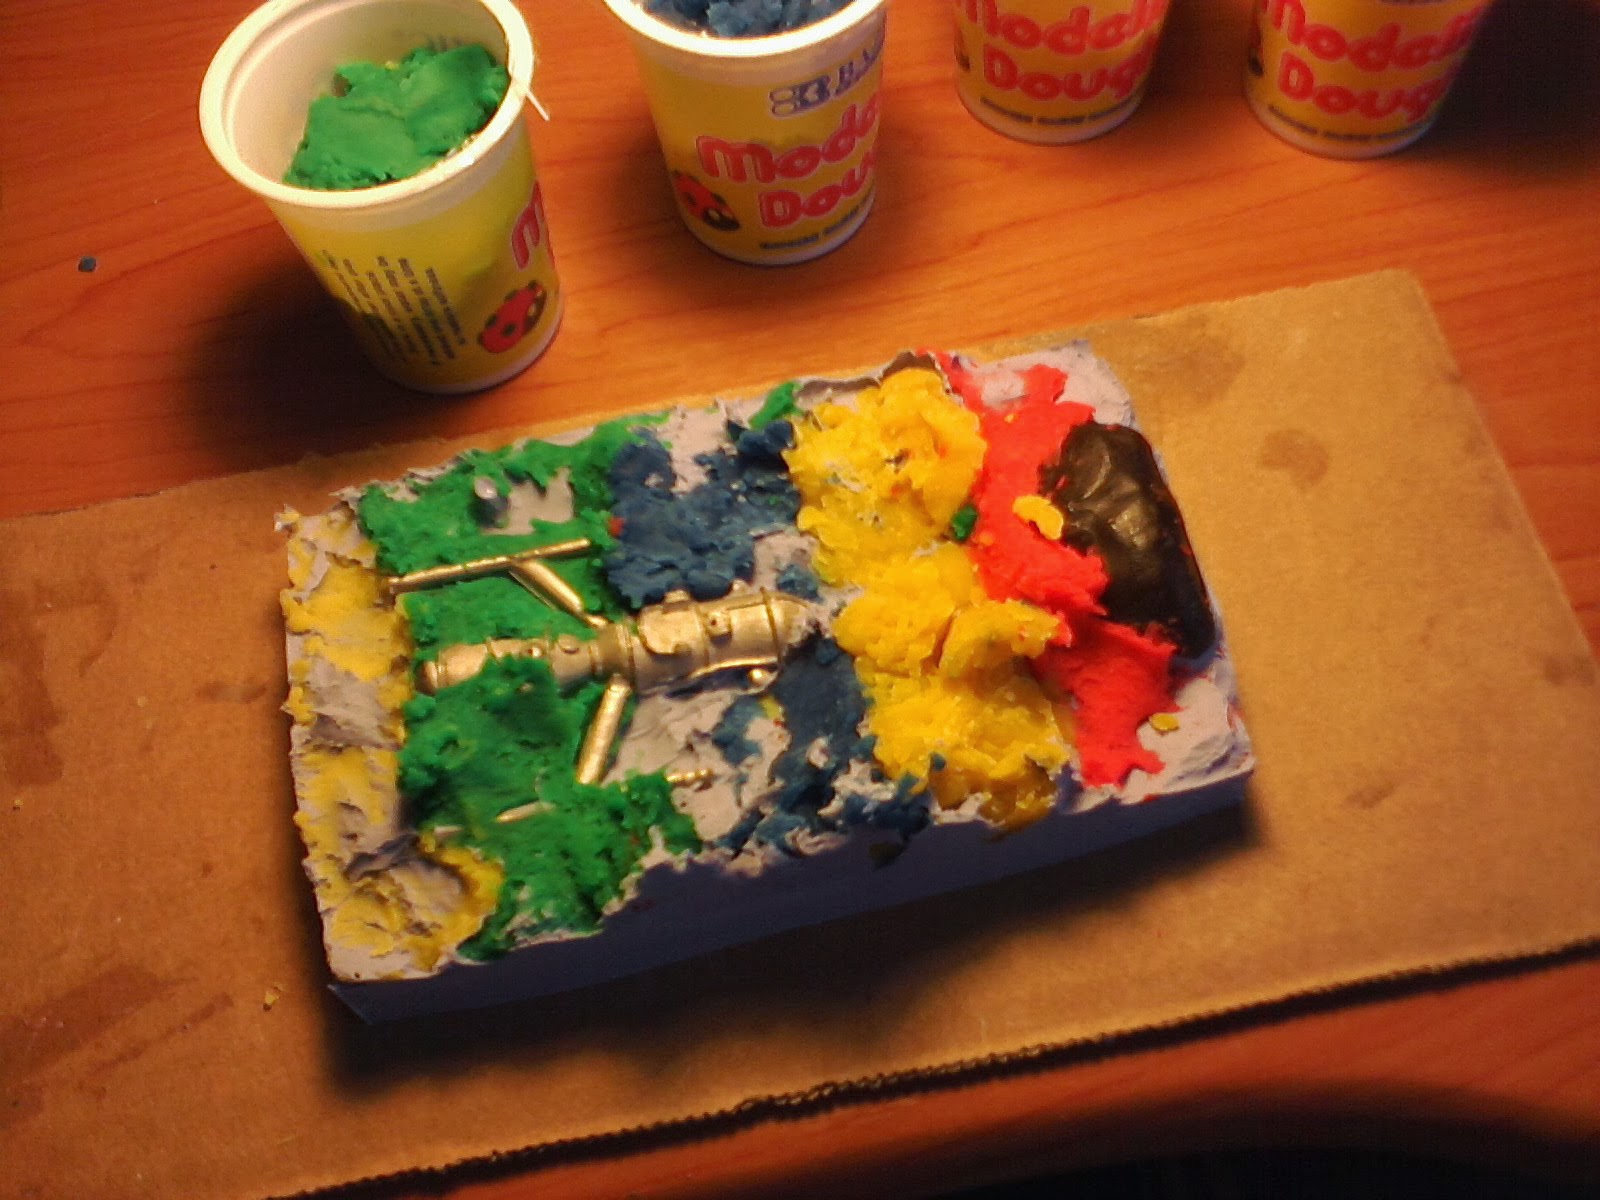
Last week I showed off the mold-making I did to duplicate the cruiser miniatures for the Star Frontiers: Knight Hawks game (the largest molds I've made to date). This week I'm taking them into kitchen for the actual metal casts.
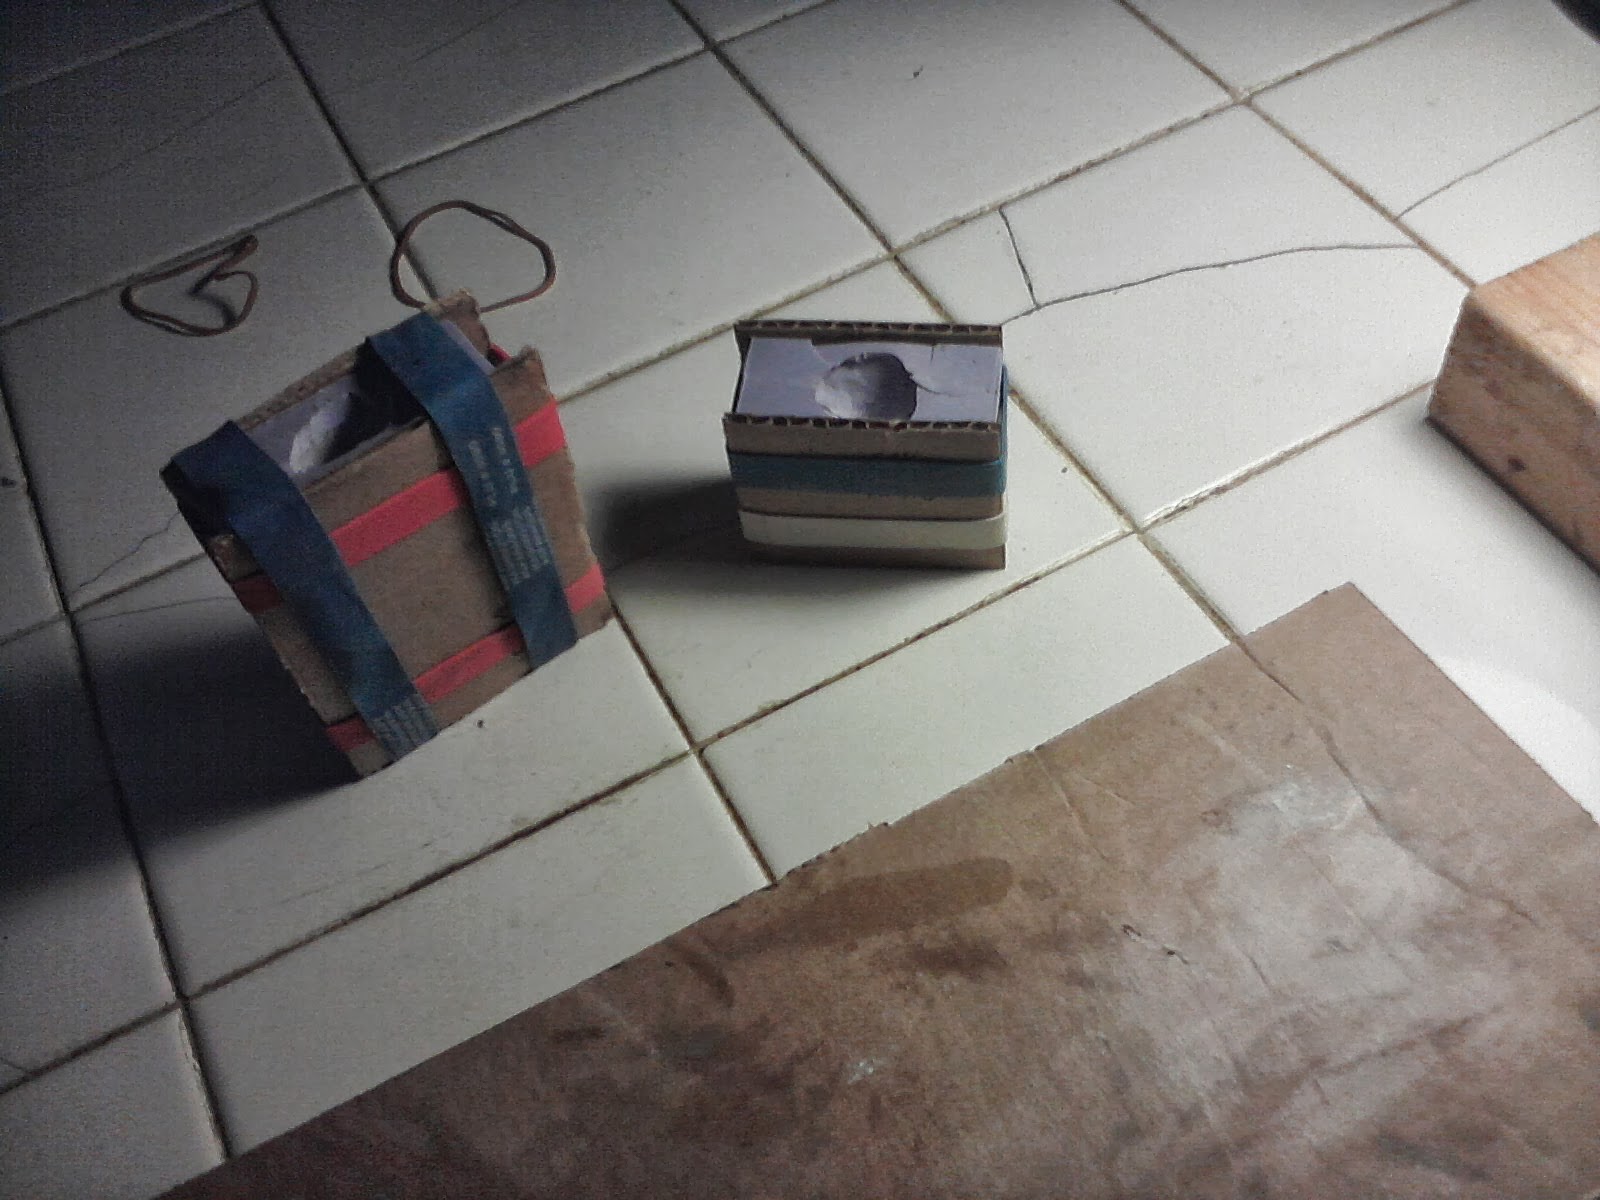
As I take this photo, I've got the biggest chunk of metal I could fit in my ladle melted and hot on the stove. The mold for the UPF cruiser figure has been cleaned, prepped, dusted with talcum powered, and joined together with cardboard and all the big rubber bands I could find.
Usually the first few casts are playing around with how big the pour-hole connector needs to be. Small means the metal won't pour in properly, large means the sprue is hard to clean up and may snap part of the model off when you try to clean it. Since you can open it up with a knife but can't close it down once rubber is removed, I start pretty small and open it up a tiny bit with each pour. The very first pour just clogs up in the pour-hole and doesn't get any in the figure at all. Here on the second pour (shown below), most of the model filled up, but the pour-hole clogged before it was complete.
By the third pour we have metal in the whole figure but a minimal sprue (and so easy to clean up in the nose area). However, a new difficulty raises its head: the rubber bands don't get this mold very tight, and there's a rather large amount of leakage and "flash" around the seam of the entire figure. I try putting on more rubber bands, or placing them in key areas more carefully, but that doesn't change anything. That's going to be a big cleaning job with needle-nosed pliers & file.
Next problem: The cleaning job is so big, in particular the internal space between the engines, that the fairly delicate engines tend to snap off with the flashing as I try to remove it. Here are two casts that have been wrecked at the end of the cleaning because of that, and will have to get re-melted down. (Also shown are the extra engines I'm making to add to each figure.)
Another day, and I decide to bring in some more serious equipment. My partner Isabelle goes to her sculpture studio and brings back a big 3-foot-long clamp for molds such as this. I put the mold between blocks of wood (not just cardboard) and ratchet the clamp into place carefully.
Well, this almost works but not quite. The mold is now tight enough that there's no leakage or flash around the edge -- but the downside is that it's so tight the cast has actually lost some of the detail around the tops of the engines. I try using the clamp a few more times with very gentle pressure, but this issue can't be fixed. After musing about my options, I decide to go with the rubber band technique, get all of the sculpt filled in, and just commit to carefully cleaning the flashing I get around each figure. I'm only planning on making a few of these, anyway.
Another problem: My standard cool-down time is insufficient for these much larger molds. For example, here's the Sathar light cruiser after about 5 minutes of cooling down on the kitchen table. What happened here is that the pour-hole (the biggest volume in the mold) formed a solid shell around its exterior, but was still molten metal inside. Not knowing that, when I went to separate the mold, the pour-hole cracked open and spilled liquid metal over the table and almost myself. (Wouldn't be crippling but probably pretty unpleasant.) Note to self, etc.
Of course, the spindly extended engine-struts on the Sathar ships (which I've always thought the most attractive part of the design) don't always get the metal flowing all the way into them. That's actually not so bad, because I'm intending to snap some good legs apart anyway for additions, and throw the rest of the figure back in the ladle for re-use.
At some point, waiting for a mold to cool down, I realize that the handle on my ladle is actually sliding apart sideways as I watch it! I've had it going so long and hot in the kitchen this weekend that the plastic in the handle has started to melt and slip off the arm. I quickly shut off the burner at this point and rescue the ladle handle, eek.
So: There comes a point where I finally have the duplicate casts I was looking for (a pair each of UPF and Sathar cruisers), with miniature bases, stands, and extra engines, and I get some time in my workroom to assemble them. The official cruiser miniatures only come with 2 engines apiece, which doesn't match the Campaign Book rules, and generally doesn't make much more of an impression than the 2-engine frigates (although having more engines connected would make the mold prohibitively difficult). So below you can see me bracing up the Sathar cruisers, and adding the extra engine struts I cast, for 4 engines total per ship (equally around the radius of each). This involves placing & filing the struts for a smooth connection, drilling the ship & engines with a pin vice, snipping off some paper-clip wire for an internal anchor, and super-gluing the whole thing carefully together.
Nearing the end of the process, I've primed the miniatures with gray spray-paint and set up to paint them. My painting process is exceptionally simple for these ships.
First step is a flat base coat. I make the UPF ships navy blue, and the Sathar a greenish-black mix. On my initial tests Isabelle said the Sathar color wasn't any good, because "it looks like something diseased". At which point I said that was exactly what I was aiming for, because in fact many of the Sathar ships are famously named after diseases. So, a happy little accidental compliment.
Then for the finish I use dry-brushed metallic paint: silver for the UPF ships and gold (kind of suggesting brassy/bronze archaic armament) for the Sathar. These look really good! The UPF ships in particular have all kinds of nice details to them, and the dry-brushing really brings them out. On these large ships I'm happy to have more of the dark base color peeking through, representing some amount of age and battle-damage, and this brings out more contrast and detail to everything (whereas the smaller ships need to look sleeker and faster, and so a bit flat). All I have to do now is put them on their stands and they're ready for use in-game. A success! But not without a lot of trial-and-error, and learning that this is probably the upper bound of what my rubber mold-making technology can handle.
2013-11-16
2013-11-09
SciFi Saturday – Cruiser Construction, Pt. 1
My first project this year working with miniatures for the Star Frontiers: Knight Hawks game was to make molds & duplicate a number of the frigate/destroyer ships, so I could have several on each side of a fight (as shown in most of the book scenarios). My second project was to create some extra UPF assault scouts. The third project was to sculpt & cast miniatures for the one-man fighters in the game, for which no minis existed -- and which taxed my ability to work with figures & molds so very small. So the next project had to be casting some duplicates of the larger cruiser ships on each side -- from which I would learn what the issues would be for the largest-scale objects that my process can likely handle. The cruiser mold-making is shown below, with metal casting left for next week.
First of all, here's the original UPF cruiser that I'm trying to duplicate, next to finished versions of the frigate and fighter miniatures. Note that it's at least twice as large as the UPF frigate I made previously.
The mold-box I make out poster-board is obviously the largest one to date, and it took all of 4 pots of play-doh to make the bed for the first part of the mold. Also you can see that the walls are already bending out somewhat, which will turn into a bigger problem when the weight of the rubber gets poured in there.
Now, part of what I'm concerned with here is being efficient with the rubber compound. (It's rather easy to wind up throwing out half as excess using the official 3-cup mixing instructions.) In fact, making molds for two cruisers will almost use up one entire shipment of rubber compound. Anticipating this, I've quite carefully calculated the volume of the rubber I'll need for each half of the upcoming molds, and measured & marked a plastic cup with guides for that purpose. I really don't want to waste any!
So of course when I go to pour it, I slip with the cap and wind up spilling a huge glob all over my hand, table, canister, pants, floor, etc. Work gets suspended as I clean all of that up.
Anyway, the first half of the mold does get made, and a day later I took it out of the box, remove the large chunk of play-doh (putting it back in the pots for re-use later), and go to clean up that half of the mold. As you can see in the photo below, there's lots of little globs of play-doh that I have to pick out (with dental tool & brush, kind of like an archeology dig), and there are fairly big parts of the cruiser that have been buried in rubber that I also have carefully cut out. That probably takes an hour or two by itself? Definitely the least-fun part of the project.
A day after that, I've poured the other side of the mold, let it cure, and then separated the two parts. As usual, the pour-hole has been enclosed and I'll have to cut that open right after I take the photo. Looking pretty good so far, although the sides did noticeably bulge outwards on me (which bothers me mostly for how it sucks away rubber that I want covering the top).
Let's not forget about the cruiser for the Sathar opposition. Because of the extended engine struts, this one takes an even larger mold-box and even more rubber compound material. Below I have it set in its play-doh bed, with release agent sprayed on, and the rubber compound mixed and about to pour. (Fortunately this proceeds with no ridiculous spillage.)
As this largest-yet mold starts to bend and leak around the edges, I finally get smart and grab these 90-degree pieces of wood that we have laying around in the closet, and use those to brace up the sides of the mold while it cures overnight; a really nice solution. Later on I find out that the reason we have those chunks of wood is that my partner Isabelle made them years ago for use in mold-making. Oh, well, it's always satisfying when a mystery gets resolved.
After the first half cures, here I've got the remove-play-doh and cleaning project to do again. Of course, this one's even bigger and even harder to dig out. (And especially being careful around those delicate engine struts to get all the clay but not move or dislodge the figure which would cause "smearing" in the cast.)
Hours later, I've gotten it cleaned up to this level, with more to go and bits of covering rubber still needing removal. I actually think I gave up at this point and set it aside for another day. Which led to a late discovery -- it's actually a lot easier to clean up if you let it sit overnight so the play-doh dries out and gets all flaky. Finishing the cleaning the next day turned out to be much, much easier. (This advice assumes that you're patient enough to wait about 2 days per half of the mold for curing & cleaning.)
Finally, the other half of the mold gets cured and a day after that, the two halves get separated.Last thing is to take the exacto knife and open up the pour-hole, as usual, and then I think we're good to go. Next week I'll show when I take these molds to the foundry (kitchen) and actually start casting in metal.
First of all, here's the original UPF cruiser that I'm trying to duplicate, next to finished versions of the frigate and fighter miniatures. Note that it's at least twice as large as the UPF frigate I made previously.
The mold-box I make out poster-board is obviously the largest one to date, and it took all of 4 pots of play-doh to make the bed for the first part of the mold. Also you can see that the walls are already bending out somewhat, which will turn into a bigger problem when the weight of the rubber gets poured in there.
Now, part of what I'm concerned with here is being efficient with the rubber compound. (It's rather easy to wind up throwing out half as excess using the official 3-cup mixing instructions.) In fact, making molds for two cruisers will almost use up one entire shipment of rubber compound. Anticipating this, I've quite carefully calculated the volume of the rubber I'll need for each half of the upcoming molds, and measured & marked a plastic cup with guides for that purpose. I really don't want to waste any!
So of course when I go to pour it, I slip with the cap and wind up spilling a huge glob all over my hand, table, canister, pants, floor, etc. Work gets suspended as I clean all of that up.
Anyway, the first half of the mold does get made, and a day later I took it out of the box, remove the large chunk of play-doh (putting it back in the pots for re-use later), and go to clean up that half of the mold. As you can see in the photo below, there's lots of little globs of play-doh that I have to pick out (with dental tool & brush, kind of like an archeology dig), and there are fairly big parts of the cruiser that have been buried in rubber that I also have carefully cut out. That probably takes an hour or two by itself? Definitely the least-fun part of the project.
A day after that, I've poured the other side of the mold, let it cure, and then separated the two parts. As usual, the pour-hole has been enclosed and I'll have to cut that open right after I take the photo. Looking pretty good so far, although the sides did noticeably bulge outwards on me (which bothers me mostly for how it sucks away rubber that I want covering the top).
Let's not forget about the cruiser for the Sathar opposition. Because of the extended engine struts, this one takes an even larger mold-box and even more rubber compound material. Below I have it set in its play-doh bed, with release agent sprayed on, and the rubber compound mixed and about to pour. (Fortunately this proceeds with no ridiculous spillage.)
As this largest-yet mold starts to bend and leak around the edges, I finally get smart and grab these 90-degree pieces of wood that we have laying around in the closet, and use those to brace up the sides of the mold while it cures overnight; a really nice solution. Later on I find out that the reason we have those chunks of wood is that my partner Isabelle made them years ago for use in mold-making. Oh, well, it's always satisfying when a mystery gets resolved.
After the first half cures, here I've got the remove-play-doh and cleaning project to do again. Of course, this one's even bigger and even harder to dig out. (And especially being careful around those delicate engine struts to get all the clay but not move or dislodge the figure which would cause "smearing" in the cast.)
Hours later, I've gotten it cleaned up to this level, with more to go and bits of covering rubber still needing removal. I actually think I gave up at this point and set it aside for another day. Which led to a late discovery -- it's actually a lot easier to clean up if you let it sit overnight so the play-doh dries out and gets all flaky. Finishing the cleaning the next day turned out to be much, much easier. (This advice assumes that you're patient enough to wait about 2 days per half of the mold for curing & cleaning.)
Finally, the other half of the mold gets cured and a day after that, the two halves get separated.Last thing is to take the exacto knife and open up the pour-hole, as usual, and then I think we're good to go. Next week I'll show when I take these molds to the foundry (kitchen) and actually start casting in metal.
2013-11-02
SciFi Saturday – Sathar Ship Names
This is a continuation of my analysis of ship names in the Star Frontiers: Knight Hawks game; today, looking at the names of the various Sathar Attack Vessels. Again, I've looked at both rulebooks in the boxed set, all the official modules, and Dragon/Ares magazine articles. Like last time, you'll see a complete list of names below, for the entire fleet order-of-battle at the time of the Second Sathar War (Campaign Book, p. 55) -- which also matches the total number of counters that come with the boxed set:
For the 25 officially-identified Sathar ships, we see that the names are most commonly related to one of the "Four Horsemen": War, Famine, Pestilence, or Death (in fact, each of those specific words were included in at least one published ship name). Many are related to concepts of damnation (5/25 = 20%), storms and wind (4/25 = 16%), or poisonous/dangerous animals (4/25 = 16%). In addition, a sizable proportion of the names are given as compound words (9/25 = 36%).
Sathar Ship Name Roster
- Frigates (8) – Stinger (TM9), Disease (Ares88), Apocalypse (Ares88), Hellscar (Ares96), Torment, Convulsion, Calamity, Blasphemy.
- Destroyers (15) – Venomous (TM8), Vicious (TM9), Pestilence (TM9), Doomfist (TM9), Nemesis (TM15), Bludgeon (TM16), Viper (TM16), Vampire (SFKH0), Deathwind (SFKH0), Devastator (SFKH0), Balefire, Contagion, Corruption, Pernicious, Mortifier.
- Light Cruisers (7) – Faminewind (TM15, Ares88), Deathstroke (TM16), Plaguewind, Warscythe, Malediction, Ruinator, Night Foe.
- Heavy Cruisers (8) – Perdition (TM8), Star Scourge (TM9), Carrion (TM16), Firestorm (SFKH4), Blood War (Ares88), Grim Reaper, Black Ruin, Excommunicator.
- Assault Carriers (4) – Infamous (TM9), Maelstrom (TM16), Predator (SFKH4), Deathknight (Ares86).
Source Key: TM = Tactical Operations Manual (i.e., boardgame rules, with page number); CB = Campaign Book (with page number), SFKH (SFKH official module, with number), Ares (Dragon magazine Ares section, with issue number). Where no source is given, the names were added by myself (Delta).
For the 25 officially-identified Sathar ships, we see that the names are most commonly related to one of the "Four Horsemen": War, Famine, Pestilence, or Death (in fact, each of those specific words were included in at least one published ship name). Many are related to concepts of damnation (5/25 = 20%), storms and wind (4/25 = 16%), or poisonous/dangerous animals (4/25 = 16%). In addition, a sizable proportion of the names are given as compound words (9/25 = 36%).
Notes: Ares88 includes a light cruiser named Famine, which is so close to the Faminewind (from TM15), that I assume it's the same ship and not included it separately above. Ares96 identifies a UPF frigate named Hellscar, which seems much more appropriate as a Sathar vessel, and so has been included above. In rare cases, names are given for a few Sathar Fighter ships, but I did not bother to include them above (Ripper and Reaver in SFKH4; Horror and Fear in Ares86).
I found the following very helpful for making up some of the new names above: "English compound words and phrases: a reference list, with statement of principles and rules", by F. Horace Teall (link). In addition to those new names above, here are some more that got cut from the final list, that you might consider if you want to expand or make replacements to the Sathar ship roster -- Defiler, Vilifier, Spoliation, Anethema, Denunciator, Purgatory, Condemnation, Iniquity, Paroxysm, Distemper, Retribution, Cancer, Rancor, Contamination; Backstabber, Warwind, War Head, Cross Bones, Rats Bane, Wolfs Bane, Pain Killer, Crosshair, War Waste, King Cobra.
2013-10-26
SciFi Saturday – UPF Ship Names
The Star Frontiers: Knight Hawks Campaign Book concludes with a treatment of the Second Sathar War, a grand campaign scenario for two players, simulating an all-out war between the UPF and Sathar invaders throughout the Frontier sector of space. This includes a complete "Order of Battle" listing all the ships available to each side at the time of the conflict (upwards of about 100 ships per side; CB p. 55). Below I present a list of ship names for every one of the UPF vessels involved in the campaign:
UPF Ship Name Roster
- Assault Scouts (14) – Stiletto (TM8), Dauntless (TM9), Razor (TM9, Ares91), Scimitar (TM15, Ares91), Dagger (TM15, Ares91), Rapier (TM16, Ares91), Lancet (TM16, Ares91), Avenger (SFKH1), Justifier (SFKH1), Morning Star (SFKH1), Starpacer (SFKH1), Dirk (SFKH1), K'Riss (SFKH4), Doboru (SFKH4), Arrow (Ares95), Remora (Ares95)
- Frigates (7) – Z'Gata (TM8, Ares91), Driadia (TM9, Ares91), Shimmer (TM15, Ares91), Zz' Nakk'T (TM16, Ares91), Z'Yttl (SFKH1), Daring (SFKH1), Flying Cloud (SFKH4), Electron (Ares88), Proton (Ares88)
- Destroyers (5) – Allison May (TM9), Melinda McCoy (SFKH1), Chivalry (Ares88), Faith (Ares88), Arcturon (Ares95)
- Minelayers (3) – Z'Rak't Zoz (TM16), Hiskassan, Siren
- Light Cruisers (8) – Courageous (TM15, SFKH1, Ares91), Honor (Ares88), Glory (Ares91), Audacity, Gallant, Resolution, Valorous, Stoutheart
- Heavy Cruisers (1) – Zamra (Ares91), Grak (Ares91)
- Assault Carriers (3) – McCormick, Kimura, Hakosoar
- Battleships (3) – Admiral Clinton (TM9, CB48, Ares88), Admiral Morgaine (CB48), Admiral Harsevoort (CB48)
Source Key: TM = Tactical Operations Manual (i.e., boardgame rules, with page number); CB = Campaign Book (with page number), SFKH (SFKH official module, with number), Ares (Dragon magazine Ares section, with issue number). Where no source is given, the names were added by myself (Delta).
Where did these names come from? First, note that the campaign ship rosters precisely match the number of cardboard counters for each ship type that come in the SFKH boxed set -- so you can just split up all the counters to each player and that represents their total fleets. There is one exception: while the order-of-battle text gives the UPF side just 2 Assault Carriers, the box comes with 3 Assault Carrier counters (A, B, and C). For simplicity, I do give this third carrier to the UPF player (also: at some point I lost an Assault Scout, so they don't get that).
Given that synchronization, I started by compiling all the ships identified by name in the Tactical Manual, the Campaign Book, official SFKH Modules, and various Dragon/Ares magazine articles -- at that point I was pretty close to having an official name for every ship in the boxed set (excepting fighters, who go without names).
Now, some ship types are given an overabundance of names -- more than exist in the boxed set -- and with some outliers, I've included them all above (e.g.: assault scouts, frigates, and heavy cruisers). Compare to the values in parentheses for the actual number commissioned in the Second Sathar War, and use the extra names for any new ships or replacements. But in other cases, there were some missing ship names that needed to be filled in. So I did an analysis of the existing names and made up some new ones that fit the same character. Generally, for UPF vessels, we see names that are in one of the following categories: (1) synonyms for the word "courage", (2) weapon types, especially small blades, (3) names of people (including non-human aliens), and possibly (4) names of places. (Note that this pretty much closely matches how U.S. Navy ships have been named; frequently using a person or city/state name.) I've followed the same distribution of each for the ones that I added.
Some publications I didn't include above: Ares #17, prior to the fold-in to Dragon magazine, has an article on miniatures variants (basically the same content as the conversion booklet that comes with the miniature packs, here credited to Carl Smith), including a scenario with a battleship Constellation, destroyer Port Yziar, and frigate Klikk-T'llicck. However, this contradicts the key point that the UPF only has 3 battleships (with the names given above), and the article has other details incorrect, so I consider it to be non-canon. Meanwhile, the much later Zebulon's Guide supplement has so many contradictions and misunderstandings inside that it's painful for me to even read it, so I've skipped that, too.
Other notes: Ares86 includes a UPF assault scout named Devastator, duplicating a name previously given for a Sathar destroyer (in SFKH1), so that was not included above. Ares91 has a light cruiser named Courage, which in the interest of clarity has been assumed to be the same as the vessel Courageous (originally from TM15). This scenario also includes two heavy cruisers in the battle, even though the UPF only has one in the entire fleet per the boxed set (but I've included both names above). Ares96 speaks of a UPF frigate called the Hellscar, which seems much more likely the name of a Sathar vessel, and so I've moved it to that list instead. (Perhaps these are more miscommunications due to Sathar saboteurs? Crafty devils.)
With this list, I never have to think about making up a new name, I just pick one from the established list -- for example, that's what I did for my new boardgame scenarios from earlier in the year (link to the 1st). I'll treat the Sathar fleet in a separate post next week.
2013-10-19
SciFi Saturday – Forging Fighters Foes
Previously I showed how I made custom UPF fighter miniatures for the Star Frontiers: Space Hawks game (to fill in one of the types for which no official miniatures were ever made). Of course, it wouldn't be fair to do that without also making some for their enemies, the evil worm-like Sathar. So here's how that went, including a cautionary tale of something that didn't work out:
First of all, as a guide for both sets of fighters, I've been using this extremely nice close-up illustration by Jim Holloway (from the Campaign Book p. 54; as well as details from the counter sheets that come with the game). This would be from the year right before the Paranoia RPG was first published, and Holloway became forever associated with sci-fi dystopia comedy art (at least in my mind). The Sathar ship type is in the lower part of the picture.
Here's my best replication of that ship, in green stuff sculpting clay. This took me about an hour of work and actually came out better than expected. (There's a first attempt, not shown here, that was stretched out too much for the desired scale.) I'm about to start the process of half-packing it into play-doh and pouring rubber compound on top.
A day later, once the rubber has cured, I unpack it and clean up all the play-doh. Now it will go back in the box for the second part of the rubber compound.
A day after that, I have my two-part mold ready to go and I'm casting the first copy. This is coming out very nicely, I think.
Similar to the UPF fighters, I'm making a squad of 3 fighters cast together. So here's the 3 copies of the first fighter. They are very small. (This was surely the lower limit of my personal ability to detail the figures.)
At this point I've super-glued the 3 individual figures together into a joint squadron (which surprisingly difficult to do, because of the tiny contact points: a lot of filing and figures slipping off each other). They've been half-packed in play-doh, release agent sprayed on, and the rubber compound is mixed and about to be poured on top.
One day later I get to clean up that half of the mold. Note the rather unusual arrangement; since one fighter is sitting "higher" than the others, it's kind of sitting in a trench of the mold that I have to dig out. The empty space between them is being taken up by a narrow flap of rubber that I'm hoping hangs to the rest of the mold. Also, I was a bit indecisive about placing the pour-hole (I think the most critical part of mold creation), and the sprue is actually aimed right at that empty space. I'm trying to clean that connection up with a dental tool before then second part of the mold gets mode.
Next day: I've got both parts of the mold complete and I'm in the kitchen about to pour metal into it. Also, I have the mold for the necessary base platform going at the same time.
Here's the first cast. Unfortunately the empty space between the fighter figures has entirely filled up with solid metal. This is due to a confluence of the issues with the narrow flap of rubber not sitting in the right place, and the pour-hole spilling directly into that space on its connection. I consider a couple things at this point -- living with the miniature as-is (super ugly), or drilling out the center of each cast I make with a pin-vice (labor-intensive and winds up not looking good an the one attempt). Ultimately, I wind up tossing this particular mold as a failure and have to start the whole process over again.
After another weekend of work & rubber curing, here's the new mold (abbreviating the repeated construction steps for this). Note that, on my partner Isabelle's suggestion (she's actually the MFA sculptor in the house) I've got it aligned in a different direction. Instead of the empty space running vertically down the upright mold as before (and hoping for a little rubber flap to hang in there right), the ships and the empty space now sit horizontally in the mold (so the gap is recreated more solidly, half on each side of the mold). Also I've actually planned out the pour-hole connection, running into the fuselage of the fighter on the far left of the mold. This had the side-effect of metal not wanting to run all the way across the figure and fill up the right-hand side (it has to take two right-angles on different axes to get there). So I cut in another connection to the right side, and after a few test casts I got it to work at least half the time, thereby completing the couple of casts that I wanted out of it.
So you've been warned: planning out the arrangement two-part mold, and as always the pour-hole connection is extremely important -- especially if there's any negative space in the figure, which makes it extra-tricky. (In fact, I'm not sure how my prior UPF fighters actually came out like they did; I guess maybe I just got super lucky with that one.) Of course, after this I took my figures and assembled and painted them as usual. I'll skip showing that for now, possibly they'll pop up on a future Saturday.
First of all, as a guide for both sets of fighters, I've been using this extremely nice close-up illustration by Jim Holloway (from the Campaign Book p. 54; as well as details from the counter sheets that come with the game). This would be from the year right before the Paranoia RPG was first published, and Holloway became forever associated with sci-fi dystopia comedy art (at least in my mind). The Sathar ship type is in the lower part of the picture.
Here's my best replication of that ship, in green stuff sculpting clay. This took me about an hour of work and actually came out better than expected. (There's a first attempt, not shown here, that was stretched out too much for the desired scale.) I'm about to start the process of half-packing it into play-doh and pouring rubber compound on top.
A day later, once the rubber has cured, I unpack it and clean up all the play-doh. Now it will go back in the box for the second part of the rubber compound.
A day after that, I have my two-part mold ready to go and I'm casting the first copy. This is coming out very nicely, I think.
Similar to the UPF fighters, I'm making a squad of 3 fighters cast together. So here's the 3 copies of the first fighter. They are very small. (This was surely the lower limit of my personal ability to detail the figures.)
At this point I've super-glued the 3 individual figures together into a joint squadron (which surprisingly difficult to do, because of the tiny contact points: a lot of filing and figures slipping off each other). They've been half-packed in play-doh, release agent sprayed on, and the rubber compound is mixed and about to be poured on top.
One day later I get to clean up that half of the mold. Note the rather unusual arrangement; since one fighter is sitting "higher" than the others, it's kind of sitting in a trench of the mold that I have to dig out. The empty space between them is being taken up by a narrow flap of rubber that I'm hoping hangs to the rest of the mold. Also, I was a bit indecisive about placing the pour-hole (I think the most critical part of mold creation), and the sprue is actually aimed right at that empty space. I'm trying to clean that connection up with a dental tool before then second part of the mold gets mode.
Next day: I've got both parts of the mold complete and I'm in the kitchen about to pour metal into it. Also, I have the mold for the necessary base platform going at the same time.
Here's the first cast. Unfortunately the empty space between the fighter figures has entirely filled up with solid metal. This is due to a confluence of the issues with the narrow flap of rubber not sitting in the right place, and the pour-hole spilling directly into that space on its connection. I consider a couple things at this point -- living with the miniature as-is (super ugly), or drilling out the center of each cast I make with a pin-vice (labor-intensive and winds up not looking good an the one attempt). Ultimately, I wind up tossing this particular mold as a failure and have to start the whole process over again.
After another weekend of work & rubber curing, here's the new mold (abbreviating the repeated construction steps for this). Note that, on my partner Isabelle's suggestion (she's actually the MFA sculptor in the house) I've got it aligned in a different direction. Instead of the empty space running vertically down the upright mold as before (and hoping for a little rubber flap to hang in there right), the ships and the empty space now sit horizontally in the mold (so the gap is recreated more solidly, half on each side of the mold). Also I've actually planned out the pour-hole connection, running into the fuselage of the fighter on the far left of the mold. This had the side-effect of metal not wanting to run all the way across the figure and fill up the right-hand side (it has to take two right-angles on different axes to get there). So I cut in another connection to the right side, and after a few test casts I got it to work at least half the time, thereby completing the couple of casts that I wanted out of it.
So you've been warned: planning out the arrangement two-part mold, and as always the pour-hole connection is extremely important -- especially if there's any negative space in the figure, which makes it extra-tricky. (In fact, I'm not sure how my prior UPF fighters actually came out like they did; I guess maybe I just got super lucky with that one.) Of course, after this I took my figures and assembled and painted them as usual. I'll skip showing that for now, possibly they'll pop up on a future Saturday.
2013-10-12
SciFi Saturday – Mini Hull Sizing
Something that I recently discovered by accident -- If you line up the official Star Frontiers: Knight Hawks miniatures on top of the ship-profiles found on Campaign Book p. 6-7, most of the sizes match almost perfectly. Coincidence?
There are two obvious exceptions. First, the Battleship miniature in the top left is way, way too small relative to the other miniatures (as I've pointed out before) -- it's even smaller than the Sathar Heavy Cruiser immediately below it. Second, the Freighter in the top right is much smaller than the book image -- but this is more easily explained by a wide variation in possible hull sizes for those ships (see text in lower left for details; miniature would be HS 5, while page profile is HS 15).
Obviously, it's the shrunk-down Battleship that really irritates me here. What to do?
There are two obvious exceptions. First, the Battleship miniature in the top left is way, way too small relative to the other miniatures (as I've pointed out before) -- it's even smaller than the Sathar Heavy Cruiser immediately below it. Second, the Freighter in the top right is much smaller than the book image -- but this is more easily explained by a wide variation in possible hull sizes for those ships (see text in lower left for details; miniature would be HS 5, while page profile is HS 15).
Obviously, it's the shrunk-down Battleship that really irritates me here. What to do?
2013-10-05
SciFi Saturday – Point-Buy Combinations
Last time, I presented a fairly simple point-buy system for setting up games in Star Frontiers: Knight Hawks. This was established as the best we could do with a fairly crude battle-simulator program (no movement; faster ship fires first and then each side blasts away). And what happens next once I get one of these wargame balance-simulators going is that I get a little addicted to seeing what questions I can get it to answer for me.
(These are indexed starting from zero to match up with the internal simulator program code.) Here are the results from these matchups:
So what this shows is that combo #0 (the lone Heavy Cruiser) is favored to win 54% of its fights against combo #1 (the Destroyer & Scout), but not against any other combination. In summary: As we observed when we first started gaming with the SFKH ship prices, the smaller ships tend to beat the big ones. The all-Assault-Scout combination seems to be the best here, favored over the other combinations. But under our point-buy system, the advantage is quite small: all of the combinations are close to 50% win percents across all the other types (within +/-5% in each case). The Scouts are only a 52% favorite over the Heavy Cruiser, basically a coin-flip. Almost surely the victory will be decided by the better player's tactical movement and decision-making, or simple luck of the dice, regardless of which combination they play with. (Side note: I also considered these with 5-point combos of a Light Cruiser, or Frigate & Scout, but the 5-point combos were roundly beaten by all the others, with average win percents only in the 30% range.)
And below are the results of 10,000 combats each between each possible matchup of these 17 different combinations of ships:
Obviously, that's a lot of data there (I had to shrink the font to fit on the page, sorry), so let's analyze. Here's the Top 5 best-performing combinations in this batch:
Top 5 (12-Point Buy)
What we see here is that there are some clear favorites among the choices (as opposed to the 6-point level, where everyone hovered around 50% average win rates). The favorites again have a tendency towards the smaller ships: every one of the top 5 includes one or more Assault Scouts, and the very best performer -- a Carrier and one Scout escort -- is really attacking by way of 6 Fighters and the fast Assault Scout. However, the big ships are not totally useless, either: Note that the 2nd best combo features a Battleship with two Scout escorts (and I'm quite pleased to have the BB be a legitimately strong option here). The all-Scout combination, #16, does not appear in the Top 5 (although it is actually 6th-best, with an average win percent of 56% against all other types). But note that none of the Top 5 can be fielded by the Sathar (since they don't have Assault Scouts).
On the other hand, note that none of the combinations beat all of the others. Intriguingly, the #1 combo (Carrier with Fighters & Assault Scout) is actually usually beat by combo #14, which is just a squad of 4 Frigates (with no scouts involved). It's a narrow advantage (51% to the Frigates), but there it is. We did note last time that the Frigates are a strong choice in this point-buy system, and it appears that their many beam weapons do a good job of shooting down a squadron of incoming Fighters. So if you know for a fact that your opponent was always playing Carrier & Scout, then your response should be to bring a squadron of all-Frigates to the table.
For comparison sake, here are the bottom 5 in this matchup:
Bottom 5 (12-Point Buy)
The lesson here is that what you don't want to do is bring a fleet of only-large-capital-ships to the fight without any speedier escorts. A pair of Heavy Cruisers alone, or three Destroyers, are simply awful. So is a Battleship with one Destroyer. Generally speaking, the Destroyer suffers a bit in this point-buy scheme compared to the Frigate (it has only 2 extra rocket battery shots, and 10 more hull points, in exchange for slower maneuvering and +33% cost), but as we noted before, there simply isn't any wiggle room available in the numbers we used to modify that at all. Thus it's not too surprising that it shows up a lot in the Bottom 5 here. But it did show up in the lead of one of the Top 5 combos, too, so it's not a total lost cause.
So in summary, it seems like this point-buy scheme is pretty robust, especially taking the 12-point-buy level as an exemplary example. No combination of ships completely dominates all of the others, and the best results come from mixed combinations of different ships. That should provide a lot of space for players to play with, both in the meta-game (of determining which group of ships to bring to the table), and the tactical game itself (maneuvering and shot selection to make the best of the fairly narrow advantages between each combination of ships).
6-Point Combos
While the simulator runs uniform (homogeneous) groups of a single ship type at each other to see which is best, obviously in reality the game is played with combinations of whatever ships a player think work well together. And I wanted to find out which combinations would have an advantage, and extended the simulator a bit to handle that. For starters, what if we give each player 6 points (mega-credits) to play with under that system? There are only 4 combinations possible, actually:| Index | Ships |
| 0 | Heavy Cruiser |
| 1 | Destroyer & Scout |
| 2 | 2 Frigates |
| 3 | 3 Scouts |
(These are indexed starting from zero to match up with the internal simulator program code.) Here are the results from these matchups:
Assessed win percents (6-point combo squads):
. .0 .1 .2 .3 Wins AvgPct
-----------------------
0 -- 54 -- -- 1 45
1 -- -- -- -- 0 45
2 64 53 -- -- 2 55
3 52 56 50 -- 3 52
So what this shows is that combo #0 (the lone Heavy Cruiser) is favored to win 54% of its fights against combo #1 (the Destroyer & Scout), but not against any other combination. In summary: As we observed when we first started gaming with the SFKH ship prices, the smaller ships tend to beat the big ones. The all-Assault-Scout combination seems to be the best here, favored over the other combinations. But under our point-buy system, the advantage is quite small: all of the combinations are close to 50% win percents across all the other types (within +/-5% in each case). The Scouts are only a 52% favorite over the Heavy Cruiser, basically a coin-flip. Almost surely the victory will be decided by the better player's tactical movement and decision-making, or simple luck of the dice, regardless of which combination they play with. (Side note: I also considered these with 5-point combos of a Light Cruiser, or Frigate & Scout, but the 5-point combos were roundly beaten by all the others, with average win percents only in the 30% range.)
12-Point Combos
As considered above, 6-points are not a bad entry point to the game for possibly brand-new players, but it's a very small engagement compared to those seen in the SFKH rulebooks. (The small scenarios have about 10 points to a side by this measure, with the large ones around 30 points.) In the last post, we had some evidence that the 12-point level might be an interesting threshold. So I also mapped out all the combinations at this level and ran them against each other (ships listed in abbreviated format; see here for key):| Index | Ships |
| 0 | CV, VS |
| 1 | BB, DD |
| 2 | BB, VS×2 |
| 3 | CA×2 |
| 4 | CA, DD, VS |
| 5 | CA, FF×2 |
| 6 | CA, VS×3 |
| 7 | CL×2, VS |
| 8 | CL, DD, FF |
| 9 | CL, FF, VS×2 |
| 10 | DD×3 |
| 11 | DD×2, VS×2 |
| 12 | DD, FF×2, VS |
| 13 | DD, VS×4 |
| 14 | FF×4 |
| 15 | FFx2, VS×3 |
| 16 | VS×6 |
And below are the results of 10,000 combats each between each possible matchup of these 17 different combinations of ships:
Assessed win percents (12-point combo squads):
.. 00 01 02 03 04 05 06 07 08 09 10 11 12 13 14 15 16 Wins AvgPct
--------------------------------------------------------------
00 -- 67 68 68 74 59 75 68 68 66 82 82 66 78 -- 65 70 15 69
01 -- -- -- 72 -- -- -- -- -- -- 70 -- -- -- -- -- -- 02 36
02 -- 73 -- 74 61 67 55 58 75 53 88 70 58 63 65 53 52 15 62
03 -- -- -- -- -- -- -- -- -- -- -- -- -- -- -- -- -- 00 31
04 -- 60 -- 63 -- 54 -- -- 63 -- 78 60 -- 55 -- -- -- 07 50
05 -- 77 -- 79 -- -- -- -- 58 -- 90 54 -- -- -- -- -- 05 49
06 -- 67 -- 68 54 61 -- 50 69 -- 84 63 -- 56 56 -- -- 10 55
07 -- 64 -- 66 55 58 50 -- 67 -- 80 61 -- 57 50 -- 50 11 54
08 -- 67 -- 71 -- -- -- -- -- -- 85 -- -- -- -- -- -- 03 39
09 -- 72 -- 76 60 67 55 58 77 -- 88 68 55 61 63 -- 53 13 61
10 -- -- -- 52 -- -- -- -- -- -- -- -- -- -- -- -- -- 01 19
11 -- 51 -- 55 -- -- -- -- 57 -- 74 -- -- -- -- -- -- 04 41
12 -- 68 -- 70 56 60 52 53 71 -- 86 64 -- 61 56 -- 55 12 57
13 -- 60 -- 60 -- 54 -- -- 65 -- 79 55 -- -- -- -- -- 06 47
14 51 80 -- 84 54 56 -- 50 63 -- 94 58 -- 52 -- -- -- 10 55
15 -- 72 -- 74 58 67 55 56 78 -- 89 68 55 63 64 -- 56 13 61
16 -- 72 -- 70 55 66 55 51 73 -- 83 62 -- 57 53 -- -- 11 56
Obviously, that's a lot of data there (I had to shrink the font to fit on the page, sorry), so let's analyze. Here's the Top 5 best-performing combinations in this batch:
Top 5 (12-Point Buy)
| Index | Ships | Wins | AvgPct |
| 0 | CV, VS | 15 | 69% |
| 2 | BB, VS×2 | 15 | 62% |
| 9 | CL, FF, VS×2 | 13 | 61% |
| 15 | FFx2, VS×3 | 13 | 61% |
| 12 | DD, FF×2, VS | 12 | 57% |
What we see here is that there are some clear favorites among the choices (as opposed to the 6-point level, where everyone hovered around 50% average win rates). The favorites again have a tendency towards the smaller ships: every one of the top 5 includes one or more Assault Scouts, and the very best performer -- a Carrier and one Scout escort -- is really attacking by way of 6 Fighters and the fast Assault Scout. However, the big ships are not totally useless, either: Note that the 2nd best combo features a Battleship with two Scout escorts (and I'm quite pleased to have the BB be a legitimately strong option here). The all-Scout combination, #16, does not appear in the Top 5 (although it is actually 6th-best, with an average win percent of 56% against all other types). But note that none of the Top 5 can be fielded by the Sathar (since they don't have Assault Scouts).
On the other hand, note that none of the combinations beat all of the others. Intriguingly, the #1 combo (Carrier with Fighters & Assault Scout) is actually usually beat by combo #14, which is just a squad of 4 Frigates (with no scouts involved). It's a narrow advantage (51% to the Frigates), but there it is. We did note last time that the Frigates are a strong choice in this point-buy system, and it appears that their many beam weapons do a good job of shooting down a squadron of incoming Fighters. So if you know for a fact that your opponent was always playing Carrier & Scout, then your response should be to bring a squadron of all-Frigates to the table.
For comparison sake, here are the bottom 5 in this matchup:
Bottom 5 (12-Point Buy)
| Index | Ships | Wins | AvgPct |
| 3 | CA×2 | 0 | 31% |
| 10 | DD×3 | 1 | 19% |
| 1 | BB, DD | 2 | 36% |
| 8 | CL, DD, FF | 3 | 39% |
| 11 | DD×2, VS×2 | 4 | 41% |
The lesson here is that what you don't want to do is bring a fleet of only-large-capital-ships to the fight without any speedier escorts. A pair of Heavy Cruisers alone, or three Destroyers, are simply awful. So is a Battleship with one Destroyer. Generally speaking, the Destroyer suffers a bit in this point-buy scheme compared to the Frigate (it has only 2 extra rocket battery shots, and 10 more hull points, in exchange for slower maneuvering and +33% cost), but as we noted before, there simply isn't any wiggle room available in the numbers we used to modify that at all. Thus it's not too surprising that it shows up a lot in the Bottom 5 here. But it did show up in the lead of one of the Top 5 combos, too, so it's not a total lost cause.
So in summary, it seems like this point-buy scheme is pretty robust, especially taking the 12-point-buy level as an exemplary example. No combination of ships completely dominates all of the others, and the best results come from mixed combinations of different ships. That should provide a lot of space for players to play with, both in the meta-game (of determining which group of ships to bring to the table), and the tactical game itself (maneuvering and shot selection to make the best of the fairly narrow advantages between each combination of ships).
Java Code
You can see the revised Java code to this simulator program below (version 1.03). If you make any interesting extensions or come up with what you think is a better point-buy regime, please let me know about it!
Subscribe to:
Posts (Atom)