2013-08-31

SciFi Saturday – Forging Fighters, Pt. 2

More work filling in the gap of no official Fighter miniatures for the Star Frontiers: Knight Hawks game. Last time I left off at the point where I'd sculpted & made a mold for a single one of these teeny-tiny fighters. Today I'll want to cast a few of them, make a three-fighter squadron formation, and then make a mold for that combined miniature.


Workday 5 -- Okay, so today I'll be casting the fighter miniatures from the completed mold for the first time. As much as I'd like it to be shorter, this usually takes me several hours when I go to do it (usually a whole afternoon). In the kitchen I'm set up with my completed mold, braces, rubber bands, and tools like a metal file (and a block of wood to use it on). I've got a dish of talcum powder and a cotton ball to prep the mold -- powder the mold well and clap it over a trash can a few times to clean the excess. (The powder helps the metal roll in smoothly and not get clogged up.) At this point I'll put the mold together, surround it with the cardboard sides, and rubber band it together very tightly.


Here I'm slowly melting the metal on the stovetop, which may take 15 minutes or so. I'll leave it on the burner the entire time that I'm working here, for all the casts I'm doing (I used to shut it off between casts, but that was very inefficient.) You can see the outline of a prior Sathar frigate that didn't come out so well, so I've melted it back down and will re-use the material today.


First pour. The metal poured in very nicely, thanks to the pour hole we were careful to make previously in the mold. No runs, drips, or errors. One consideration throughout this process is that the mold tends to trap heat, making it difficult to work with and also degrading to the mold itself. So I don't want to leave it on the hot stove top for too long -- I'll very carefully move it over to the kitchen table right after the pour and let it cool down there. These days I'm setting a timer for about 15 minutes for it to harden (to be conservative), and find something else to do in the meantime -- maybe cleaning up a cast, filing, or prepping another mold.


So here's the first fighter coming out of the mold, standing on its pour hole. This is actually an unusually optimal success (usually the first few casts don't work -- more on that later). All the detail is there, it snaps off the sprue easily, and I put the pour hole chunk back in the ladle to melt down a get re-used. Notice that I've separated the mold halves and propped them up so air gets all around them -- I'm trying to cool them off as much as possible (they stay pretty hot no matter what I do here).


An hour or more later, the first fighter is separated and cleaned up; the second is cooling on its sprue; and the third has just been poured in the mold.


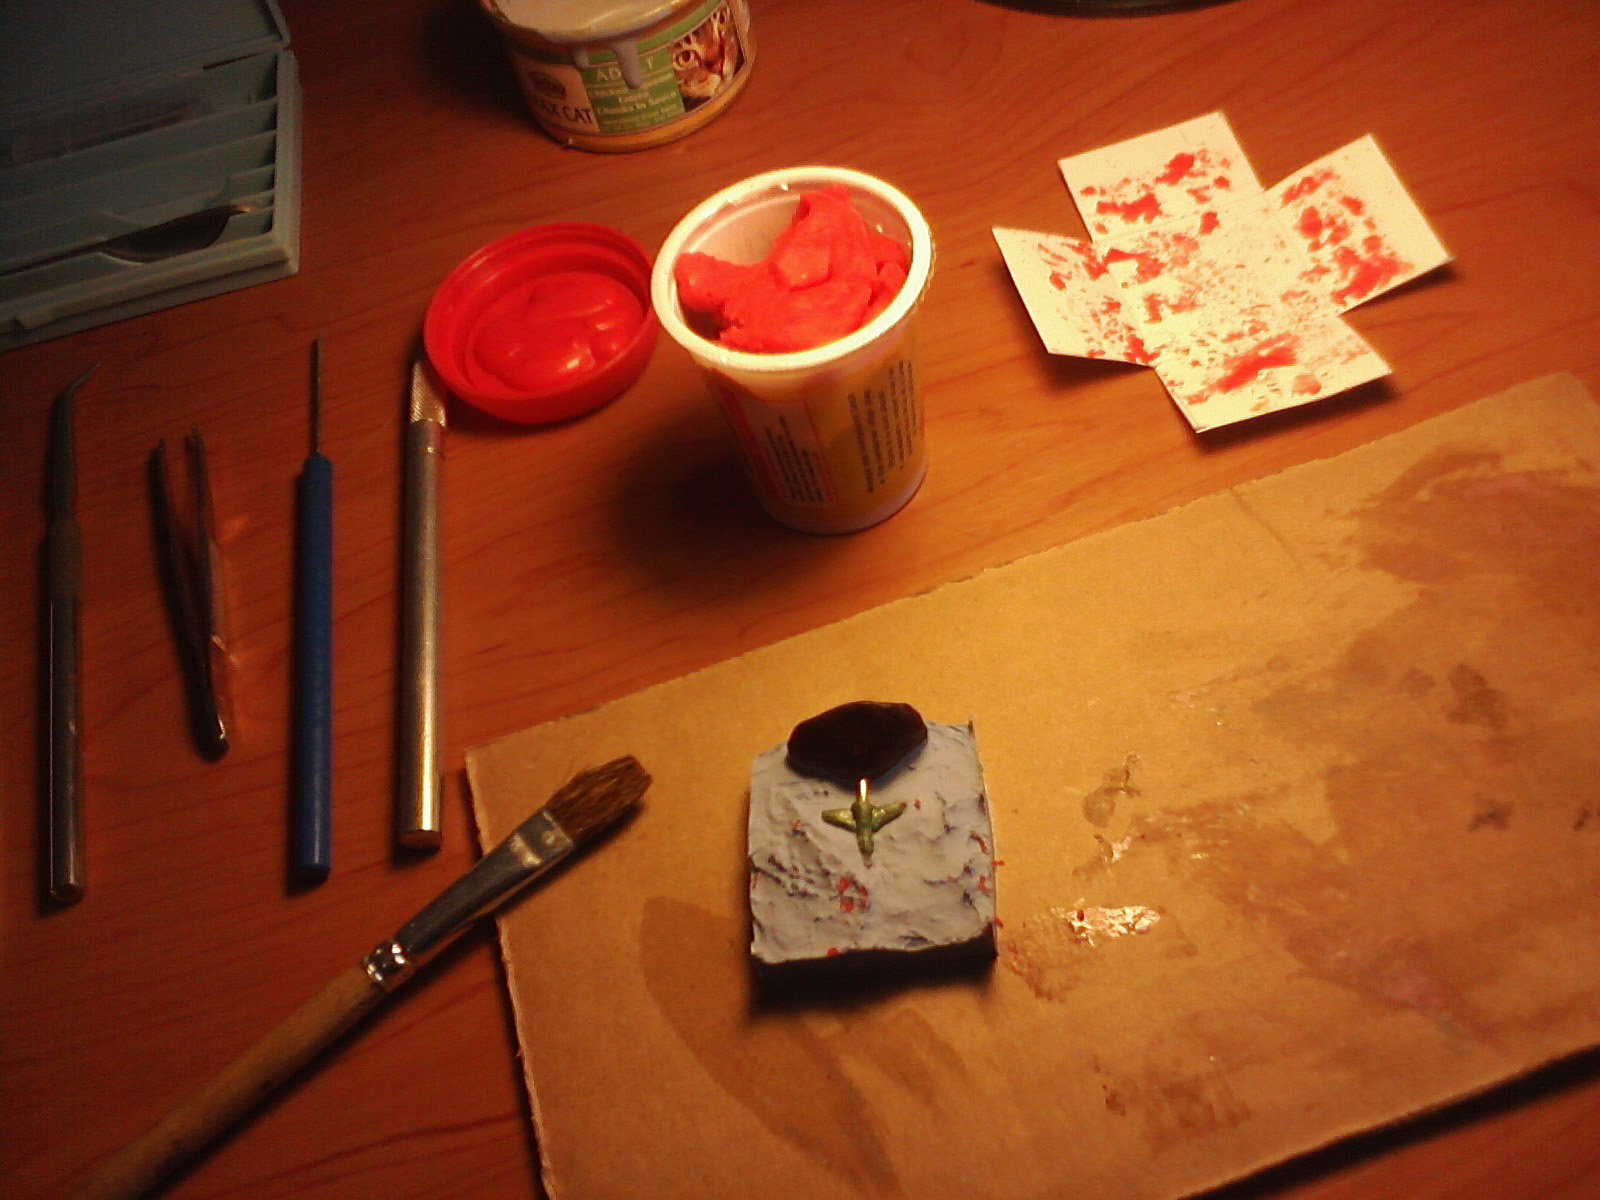
So at this point I've cleaning up my trio of fighters with the small file, and I'm also using a pin vice to drill a little in the bottom of one of them. This is where the wire base will be attached later on.


Now very carefully I'm super-gluing the fighters together into a 3-way squadron. This was kind of dicey and they fell apart on me several times. There's one on the bottom, and two mounted topside to that; ultimately I had to file down the wings a bit to fit snugly over the top, and meet smoothly fuselage-to-wing on the sides. After maybe an hour of attempts I got them together the way I wanted (they're really small, at the limit of my ability to manipulate with my fingers). It's pretty fragile, so I'll have to be very careful making a mold around it.


Workday 6 -- Making the poster board mold box for the fighter squadron. Again, I'm accounting for the premade pour hole and leaving 1/2" space around each side of the miniature.


Set to pour: I've more than half-filled the box with play-doh, set the pour hole in first, then gently set in the sculpture, poked my alignment slots with the end of a brush, and applied the release agent. The pour hole is connecting to the rear of the lower fighter (make sure to pre-plan and carefully place that, probably the most important thing). The release agent gets sprayed, brushed onto all the surfaces, and sprayed again.


Mixing the rubber compound. This takes about 5 minutes, which is also the recommended set time for the release agent. Then I'll pour it as before and let it set the 6 hours overnight.


Workday 7 -- Taking the half-mold out of the box, flipping it over, and starting the cleanup process. In particular, I got some long drippy pieces of rubber in the corners that I'll clean up with the exacto knife. (That's one signal my play-doh is getting a bit stale; if I wasn't so cheap I should go out and some fresh doh at this point; it's only like $1.50 for a six-pack around the corner.)


Successfully cleaned up and ready for the other half of the mold. Again, I was carefully to leave the sculpture and pour hole in place without jostling them at all. This one in particular is particularly delicate, so I took extra care.


Then I reform the mold box, apply the release agent, mix the rubber compound, pour over the sculpture, and clean up. This sets overnight.


Workday 8 -- I'm removing the full mold from the mold box and separating the two conjoined halves (again, the rubber runs down the sides and effectively glues the edges together). Here you can see I'm halfway through the process, carefully start from the pour hole, and gently pulling apart the two halves where they naturally separate in the center.


Taking the exacto knife and cleaning up the mold, in particular scooping out the entrance to the all-important pour hole.


Here I've cut out and labeled the cardboard braces for this mold. On another day we'll get to use this and actually see our completed fighter squadron!


2013-08-24

SciFi Saturday – Forging Fighters, Pt. 1

The official miniatures for the Star Frontiers: Knight Hawks game cover a pretty good selection of things like frigate/destroyers, cruisers, and battleships. They even include assault scouts, freighters, pirate ships like the corvette, and (in an expansion) custom yachts and privateers. One basic thing they never manufactured, however (to my knowledge) -- Fighters, the smallest combat vessel. You can sort of see why not, because they're at a much smaller scale than the other ships, and they usually operate in sufficiently large numbers that it would be difficult to manage all the miniatures on the tabletop (and in addition, they technically require a carrier or satellite base to launch them, neither of which were included in the minis game). Nonetheless, I felt this was a gap worth filling in, and that it would make a great test project for my first attempt at producing my own miniatures from scratch, including the sculpting phase. You'll see that below and in a few future installments, as I want to give some extra detail in case anyone wants to do this on their own in the future.


Workday 1 -- First of all, the sculpting job; below you're looking at my third attempt at it. The first was with some white clay on the right side of the photo -- actually pretty good, but I couldn't get it as small as the scale really required. Then I got the professional Blue/Yellow ("green stuff") clay and that does work much better. The one thing to watch out for is that it's very sticky -- it sticks to everything: fingers, desk, paper, plastic, sculpting tool, you name it. This job is pretty much at the very lower limit of what I could possibly accomplish; the fuselage of the fighter is just about as big around as the 1/16th inch wire I'm using for armature (stuck into a cork for support and handling). I have a magnifying-lens light, but I really don't like using it. Most of the work is with my fingers, sometimes using the pointy dental tool, and you can see I'm using an illustration from the SFKH rulebook (and the assault scout mini) as a guide. This took about 1 hour or less (the green stuff gets hard pretty soon after that), and came out much better than I had any right to expect for my first sculpting attempt. Certainly I was encouraged that my first project was based on a few simple, rigid geometric shapes, so I didn't have to deal with complicated organic stuff like skin, hair, fabric, etc.


Workday 2 -- Today I can start making the mold for the UPF Fighter miniature (my goal at the end is to have a mount of three fighters, but for now I start with one). One of my priorities is to save as much of the rubber compound as I possibly can -- it's really easy to waste a lot of it, especially on teeny-tiny projects like this one, where the leftover residue can easily be more than the mold itself. So while for the mold box I've seen a rigid container like a cat-food can suggested (and probably does have structural advantages), I'm making my own mold box out of simple poster board, sizing it exactly how I want (about 1/2" beyond the sculpture on each side), and that's working out just fine. Put the glossy side inwards to help a bit separating stuff out later. If you were doing a much larger project, you'd want a different technique, because the poster board structure obviously starts warping and bulging outward when it tries to hold a greater mass of rubber compound. 


Take some Play-Doh type modeling dough and half-fill the mold box with that, or a little bit more. Press the sculpture down in the middle (being careful with more delicate sculpts) and try to get the play-doh evenly halfway up around the sides. You're also seeing what I've found to be single most important element to success with these two-parts molds: a good pour-hole. Once the mold is done, you need a space to pour metal in, acting a bit like a funnel, that's big enough to easily hit when you pour with no spilling hot metal, and has a very small connecting neck to the miniature at a location that you can snap and file off later. So plan this out carefully; I sculpt the pour hole out of a harder clay and embed a wire to guide the connection point where I want it. I cannot emphasize this enough, it's completely the key to whether my mold works for me or not. And you need to include the size of the pour-hole in the dimensions of the mold box, created in the prior step. Finally, take the end of a brush and poke two or three divots in the play-doh to serve as connecting slots for the final mold (this is the top thing I tend to forget about, as I did in the photo below).


Now I'm mixing the rubber compound for the first half of the mold. Once again, this Oomoo 30 brand rubber compound has been working very well for me. The official suggestion is to use 3 plastic cups; pour the required pink & blue parts into separate cups to visually equalize, then pour together in a third and mix. But that's going to waste so much material on the sides of the cups, it will be many times what you actually get into the mold. So to minimize this I spoon the separate parts into one cat-food can and mix them together there. I'm trying to get about the same number of spoonfuls of each, but the compound is very forgiving, so if I don't get it exactly right, I've still never had a mold fail on me.


Here I've poured the purple rubber compound onto the top half of the mold box. As you do this, the recommendation is to pour into a lower corner of the play-doh, and let the rubber seep in around the bottom of the sculpture and flood in up around all the details. However, it's sufficiently viscous that I usually have to finish it off (around the pour-hole, especially) by pouring over the top at the end. Then I very gently tap the box on the desktop a few times to release some air bubbles caught within (not sure if this makes any difference but I do it). Cleaning up the spoons & mixing rod takes a few paper towels (the mixing dish can be allowed to set and cleaned out once the rubber is hard). It takes about 6 hours for the rubber to set, so I usually set it aside overnight at this point. Be really carefully if you move the mold box, keep it on a large platform and use both hands -- I've dropped one at least once here and it makes for a catastrophic mess. (Literally, because it was caused by me tripping over the cat.)


Workday 3 -- Time to open up the first half of the mold. I use an exacto knife to split of the tape in each corner and peel down the sides from the rubber & play-doh. I'm going to re-use the poster board molding box, so I'm a bit careful with it.


Flip the block of rubber-dough-sculpture over; now we've got a cleaning job to do. The mass of the play-doh will peel off (it's still soft since it was trapped in there with no air), but then you've got to carefully pick out smaller bits and pieces by hand or with a dental tool or brush. You want every little bit of play-doh, especially anything on the surface of the sculpture, removed. Make sure to not move the sculpture or pour hole from the rubber as you do this. If you do, then the resulting cast will get "smeared" like a page that got moved on a photocopier while it was getting scanned.


There, I've basically got the first half of the mold cleaned up. I've also used an exacto knife to scrape clean the poster board mold box, so I can use that again.


So now I'm putting the first half of the mold back in the box and taping the sides back up around that. A few details: Since the poster board isn't perfectly rigid, that first pour of rubber will bulge out a bit at the side and be bigger than you originally designed the box; so now you've got to bend the sides a bit to take up the extra width (I used the dental tool as a straightedge for this). Consequently, the height of the box is now a bit less than it used to be -- so thinking about this in advance, that's why I suggested in the first step to fill the box a bit more than half with the play-doh (so the rubber was less than half, matching the less than half you'll get on this side, make sense?). Above all, you don't want to smash the wider mold into the smaller box, because the mold will bend and pop the sculpture up out from where its sitting (causing the "copy smear" problem). Also, you need to use a spray release agent on the sculpture and mold right before you pour in the rubber (I should have mentioned that in the first step above). This stuff is super toxic, you don't want to breathe any in -- I open my 3rd-floor apartment back window, set it on the ledge, stretch my arm out and spray it there. To date I haven't dropped any mold down to the ground doing that.


Once again, I'm mixing the two parts of the rubber compound together, estimating by sight how much I need in total. With a little practice I got really good at doing that for these very small projects.


And pouring the second half. The mold pour hole is sticking a little bit out (again, this side is lower the way things work out) but that's okay. Leave this to set through the day or overnight or however you're doing it (6 hours minimum).


Workday 4 -- Separating out the rubber mold from the mold box.


The mold looks like a single solid brick when it comes out at this point (rubber seeps down the sides of the box, sealing everything in), so I have to carefully feel where the two parts are separate -- the pour hole is a great place to start -- and peel it apart, kind of like a banana. This is what I get when I do that. I could throw the mold box away at this point, as I won't use that again.


Now there's a job of cleaning up the rough edges of the mold with the exacto knife. Mostly this is just around the sides where the rubber seeped down in vertical sheets that you don't want. In particular, the pour hole gets entirely shut off (see last picture), so scoop that out and make sure you have a nice accessible target for pouring metal. The point of connection to the sculpture might be shut off too, so I may use tweezers very carefully to free that up. Be very conservative there, we can play around with that more on a later step.


Putting the halves together, it looks like they line up nicely with a functioning pour hole and a nice visible connection down into the mold. I also cut out some cardboard braces to use around it when I rubber-band it together for an actual metal pour later on. We'll do that another day, but for now it looks like the mold is done!


2013-08-17

SciFi Saturday – Alternate Movement

Here's an alternate rule for movement in the Star Frontiers: Knight Hawks space combat game that you might consider. There's one thing about the movement rules there that always had a slightly wonky flavor to it, which I became much more sensitive to as I started playing with miniatures for the first time recently.

In SFKH, ships have to record their speed from turn-to-turn (tracking velocity/ momentum in hexes or inches). They don't have a maximum speed (space: no friction). Ships do have an ADF rating (acceleration-deceleration factor) indicating how much they can add or subtract from their speed each turn; and an MR number (movement rating) indicating how many 60° hex face pivots they can make in any turn. You have to move at least one hex between each 60° turn, but other than that, the turns can be used at any point of the move. Let's say you have a ship with MR 2 (like a Light Cruiser or a Battleship), traveling at a speed of 7. Then the following is a standard move for it to make, starting at "S":


Now, the slightly wonky thing about this is how the ship uses all of its turning capability in the first two hexes, and then has to spend the rest of the turn traveling in a straight line ahead -- and I find that the capital ships usually take exactly this kind of path, as they try to get turned at their enemies as soon as possible. It's more visible at higher speeds (in the 10's or 20's), with a higher proportion of the movement in a straight line. And it's even more pronounced for ships with MR 1 (like Heavy Cruisers and Assault Carriers) -- they become very predictable, in that after the initial clash, they're always tooling around the outside edge of the board, pivoting in the first hex of each turn.

I lived with this for 30 years, but then when I started playing on a tabletop with miniatures it started to really irritate me. "Why am I even bothering to measure these couple of 1-inch spans at the start of each move?" With figures in play, it seems overwhelmingly fiddly and you can hardly tell the difference -- you might as well let the ship use its entire MR before even starting the move, it makes so little difference. Then an alternative dawned on me: Require that the turning be equally spaced throughout the move (subject to rounding).

SFKH Alternate Movement Rule – Each ship sets its speed before movement is played out. Divide the speed by the MR and round down. This is the minimum number of hexes (inches) that the ship must move before each face-change.

Again, take the example of the MR 2 ship traveling at a speed of 7. Seven divided by 2 (rounded down), gives 3, so the ship must move at least 3 hexes before each rotation. Now the tightest turn radius that it can accomplish is the following:


So this makes me much happier. First: It has a more realistic and reasonable "feel". The ship is firing its maneuvering jets constantly throughout the movement, and the change in direction should be approximately equal throughout the turn. It's no longer front-loaded with a tight turn at the start and then an extended straight-line afterward. Second: On the tabletop, it's less fiddly and much easier to implement with ruler & compass. Instead of measuring a couple of tiny 1" spans for the starting turns (which is almost insignificant, and you're bumping into nearby models as you do it), this longer span is weighty and usually gets the ship into the open where use of the compass is easier.

Some other things upon which this will have secondary effects – Big ships with MR 1 will be restricted to making their turn at the very end of their movement (instead of at the very beginning, as was formerly the custom). Fighters and scouts using "evasive maneuvers" to dodge a torpedo must turn as quickly as possible under this rule (not once each hex). Generally in our playtest it seems like this rule makes slower speeds more desirable; big ships are usually slowing down in order to maneuver better (probably not a bad thing, as traditionally huge speeds and leaving the map were problems). The rule for Speed 0 is still used as written, so a stopped ship can point at any hexside that it wishes as usual (probably even more important now). And while this rule seems to make tabletop miniatures play much smoother (where fractions of a 60° turn are permissible), it's possible that it may be trickier to implement on the hexmap (where the approach vectors are already limited by hex alignment, and traditionally I let players fiddle with their speed in the process of the move).

If you're playing the Star Frontiers: Knight Hawks game, particularly with tabletop miniatures, try it out and tell me what you think!

2013-08-10

SciFi Saturday – Holiday Parade

I'm on vacation this week, so no post from me this Saturday. Instead, I give you this delightful picture from my good friend and mega-talented artist B.J. Johnson (of Saturday Night Sandbox et. al.) He took one of the photos of my ongoing Star Frontiers: Knight Hawks miniatures armada project and made an honest-to-goodness cosmic scene out of it. Delightful!


Stay cool and remember -- In space no one can hear you sweat.


2013-08-07

Laplace on Games

Nothing long to post today, but I share this thought from Simon Laplace in his Théorie Analytique des Probabilités (1812) which connects two of my primary interests:

"It is remarkable that a science which began with the consideration of games of chance should have become the most important object of human knowledge."

2013-08-05

Clerics in Gods, Demi-Gods & Heroes

On the subject of gods and clerics in traditional pulp fantasy and whether D&D works better with them or without them, Geoffrey McKinney of Carcosa fame wrote me with an excellent analysis of the status of priests in Original D&D Supplement IV: Gods, Demi-Gods & Heroes. I felt it unfair to keep it to myself, so I had to share. He wrote:


I've enjoyed lately re-reading your thoughts on clerics in D&D, particularly your blog post noting their relative absence in the Giants in the Earth articles from Dragon. To emphasize your point, consider clerics' relative absence even in Gods, Demigods & Heroes:

Nagas, Nike, Odin, Balder, Hel, the Maiden of Pohja, Ukko, Mitra, Asura, Pictish shamans, and priests of the Golden Peacock can use cleric spells. That's it. That's 7 deities, 1 monster, 1 hero, and 2 groups of Hyborean clerics.

The latter two groups are clearly given cleric powers in GDG&H only because they are priests, NOT because such powers are given them in REH's tales. (This is pretty much admitted in the entry for Pictish shamans, and I do not remember the Golden Peacock guys at all from REH's stories.)

Mitra and Asura are not depicted at all in REH's stories, but only mentioned. Why the authors gave them cleric spells is beyond me.

That leaves 2 figures from the Kalevala, 3 from Norse mythology, 1 from Greek mythology, and a monster from Indian mythology. I seem to remember Ukko being little more than a name in the Kalevala, and I certainly do not remember any clerical powers wielded in the Norse Eddas or in the Greek sources. I admit ignorance in the case of Indian mythology.

What we see here is that, not only in swords & sorcery literature, but also in mythology, clerics are mostly (if not totally) absent. One might be forgiven for thinking that clerics would be heavily present in a book entitled Gods, Demi-gods & Heroes, but this is certainly not the case. Compare the very frequent references in the book to the entities' fighting-man and magic-user abilities. These two are standard entries in the stat blocks! Hell, even psionics is a standard entry. But clerical abilities are not in the stat block.

Clerics really are the odd man out in D&D.


I (delta) think those are great points. I also think that many of us would perceive Sup-IV much more bluntly as a "super high-end Monster Manual", whereas that would get retconned or re-interpreted later as a series of of cosmic beings that you wouldn't ever fight. It casts a particularly harsh light (as if it was needed) on Gygax's pitch in the AD&D work that:
DEITIES & DEMIGODS is an indispensable part of the whole of AD&D. Do not fall into the error of regarding it as a supplement. It is integral to Dungeon Mastering a true AD&D campaign. Experienced players will immediately concur with this evaluation, for they already know how important alignment is, how necessary the deity is to the cleric, and how interaction of the various alignments depends upon the entities which lead them. [AD&D DDG]
... when in actuality, the Cleric class is practically incompatible with the earlier source's work, as shown by Geof above. Other thoughts about that?


2013-08-03

SciFi Saturday – Black Holes

For my Star Frontiers: Knight Hawks game, I'm currently in the process of modeling some planets as ping-pong balls (they're almost exactly the right size according to the spatial scale of action). I was trying to come up with some clever designs (the pack I got has a whole bunch of ping-pong balls), and then it occurred to me: probably the easiest thing to do is spray paint one all-black and call it a black hole. But what would the effects of such a body be on the tactical game?

There's one official adventure for SFKH that featured a black hole: Dragon #88 (one of my favorite issues of the magazine -- hello, Marvel Super Heroes Thor!) contained a scenario called "The Battle at Ebony Eyes" by William Tracy, and it features not one but actually two black holes closely orbiting each other. In this game, ships can orbit the black holes just like any planet (from one hex away), but the primary wrinkle is that they cause illusory duplicates of everything in the surrounding area -- so basically, all the ships in the battle have something like a mirror image effect going on. Clearly that's a bit gamey-fantastic (although high-gravity lensing is a real thing, as illustrated in the picture above).

So I was wondering: What would the actual gravitational effect of a black hole be? One issue with my ping-pong model (for both planets and black holes) is that the SFKH ship models are at a radically different scale than the surrounding space scale (something like 1" = 50 meters for the former, 1" = 10,000 km for the latter). So if we set down a planet at the space scale, then it's a whole lot smaller than the ship models orbiting it, and it looks a little ridiculous. With the black hole maybe I have the option of declaring it to be at the same scale as the ships -- but which is better for gameplay?

Fortunately, I've previously worked on alternate orbital possibilities for smaller or larger planets, and worked up a spreadsheet to quickly summarize the possibilities. The key unknown in that spreadsheet is, what's the mass of my black hole? Wikipedia comes to the rescue with a formula relating black hole mass to size. As a simplifying assumption, we'll assume that this is a "Schwarzschild black hole": basically symmetric, with no angular momentum or electric charge, and so it acts like any other gravitational mass at a distance. Then the radius of the event horizon in kilometers is related to mass by about: r ~ 3 M/M(sun), where M(sun) is about 2×10^30 kg. Turning this around algebraically, we get M ~ r×M(sun)/3. So for my two candidate black hole sizes (a ping-pong ball being 40mm or about 1.5 inches in diameter):

Black Hole Type I -- Ship scale, about 50 meters radius. M ~ r×M(sun)/3 = 0.05×2×10^30/3 ~ 3×10^28 kg.

Black Hole Type II -- Planet scale, about 8,000 km radius. M ~ r×M(sun)/3 = 8000×2×10^30/3 ~ 5×10^33 kg.


Then I can fill out the orbital spreadsheet and see the results below.


What we see is this: At the smaller ship scale, the black hole is at least conceivably usable in the tactical game. At a range of 50 inches (maybe the very edge of your gaming table), a ship can orbit at a rate of 4 inches/turn using the black hole's gravity. At a middle range 10 inches, the orbital speed is 8 inches/turn (i.e., making a cycle about every 8 turns or so, kind of like standard orbiting behavior in the core game). At a short range of 2 inches (like standard orbit expectation), an orbiting vessel would flash around at a speed of almost 20 inches, that is, almost making two complete orbits every turn!

If we consider using the planet-scale black hole, then things get quasi-comical (remember that the black hole is on the order of a billion times more dense than a like-sized planet). Even on the furthest edge of your standard playing space the orbital velocity is 1,500 inches (i.e., about 5 full orbits around the perimeter of your table in a single turn). At a mid-range the speed is over 3,000 inches (almost 60 orbits in a turn), and at standard close orbit the speed approaches 8,000 inches (a whiplash-inducing 600+ cycles in a single game turn).

So clearly if I use this ping-pong modeled black hole in my Star Frontiers: Knight Hawks game, then I'll declare it to be at ship-scale of about 50 meters radius, with effects that are reasonable near the edge of the board, and challenging to deal with (but not utterly insane) near the center. Also this has the advantage of looking nicer, next to the same-scale ship miniatures. You could consider using different-sized black holes in your game but the preceding is about the range of possibilities. See Wikipedia: Micro-black holes with 0.1mm size and Moon-mass would have no effect on ship movement; Stellar-size and above would already be several hundred times more powerful than my "Type I" above, and thus likely unusable for game purposes.

Oh, one final thing: Run into the black hole and you're dead. (Or at least playing a different game system.)

[Revised ODS spreadsheet here if you want it.]