Workday 5 -- Okay, so today I'll be casting the fighter miniatures from the completed mold for the first time. As much as I'd like it to be shorter, this usually takes me several hours when I go to do it (usually a whole afternoon). In the kitchen I'm set up with my completed mold, braces, rubber bands, and tools like a metal file (and a block of wood to use it on). I've got a dish of talcum powder and a cotton ball to prep the mold -- powder the mold well and clap it over a trash can a few times to clean the excess. (The powder helps the metal roll in smoothly and not get clogged up.) At this point I'll put the mold together, surround it with the cardboard sides, and rubber band it together very tightly.
Here I'm slowly melting the metal on the stovetop, which may take 15 minutes or so. I'll leave it on the burner the entire time that I'm working here, for all the casts I'm doing (I used to shut it off between casts, but that was very inefficient.) You can see the outline of a prior Sathar frigate that didn't come out so well, so I've melted it back down and will re-use the material today.
First pour. The metal poured in very nicely, thanks to the pour hole we were careful to make previously in the mold. No runs, drips, or errors. One consideration throughout this process is that the mold tends to trap heat, making it difficult to work with and also degrading to the mold itself. So I don't want to leave it on the hot stove top for too long -- I'll very carefully move it over to the kitchen table right after the pour and let it cool down there. These days I'm setting a timer for about 15 minutes for it to harden (to be conservative), and find something else to do in the meantime -- maybe cleaning up a cast, filing, or prepping another mold.
So here's the first fighter coming out of the mold, standing on its pour hole. This is actually an unusually optimal success (usually the first few casts don't work -- more on that later). All the detail is there, it snaps off the sprue easily, and I put the pour hole chunk back in the ladle to melt down a get re-used. Notice that I've separated the mold halves and propped them up so air gets all around them -- I'm trying to cool them off as much as possible (they stay pretty hot no matter what I do here).
An hour or more later, the first fighter is separated and cleaned up; the second is cooling on its sprue; and the third has just been poured in the mold.
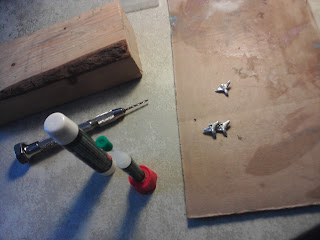
So at this point I've cleaning up my trio of fighters with the small file, and I'm also using a pin vice to drill a little in the bottom of one of them. This is where the wire base will be attached later on.
Now very carefully I'm super-gluing the fighters together into a 3-way squadron. This was kind of dicey and they fell apart on me several times. There's one on the bottom, and two mounted topside to that; ultimately I had to file down the wings a bit to fit snugly over the top, and meet smoothly fuselage-to-wing on the sides. After maybe an hour of attempts I got them together the way I wanted (they're really small, at the limit of my ability to manipulate with my fingers). It's pretty fragile, so I'll have to be very careful making a mold around it.
Workday 6 -- Making the poster board mold box for the fighter squadron. Again, I'm accounting for the premade pour hole and leaving 1/2" space around each side of the miniature.
Set to pour: I've more than half-filled the box with play-doh, set the pour hole in first, then gently set in the sculpture, poked my alignment slots with the end of a brush, and applied the release agent. The pour hole is connecting to the rear of the lower fighter (make sure to pre-plan and carefully place that, probably the most important thing). The release agent gets sprayed, brushed onto all the surfaces, and sprayed again.
Mixing the rubber compound. This takes about 5 minutes, which is also the recommended set time for the release agent. Then I'll pour it as before and let it set the 6 hours overnight.
Workday 7 -- Taking the half-mold out of the box, flipping it over, and starting the cleanup process. In particular, I got some long drippy pieces of rubber in the corners that I'll clean up with the exacto knife. (That's one signal my play-doh is getting a bit stale; if I wasn't so cheap I should go out and some fresh doh at this point; it's only like $1.50 for a six-pack around the corner.)
Successfully cleaned up and ready for the other half of the mold. Again, I was carefully to leave the sculpture and pour hole in place without jostling them at all. This one in particular is particularly delicate, so I took extra care.
Then I reform the mold box, apply the release agent, mix the rubber compound, pour over the sculpture, and clean up. This sets overnight.
Workday 8 -- I'm removing the full mold from the mold box and separating the two conjoined halves (again, the rubber runs down the sides and effectively glues the edges together). Here you can see I'm halfway through the process, carefully start from the pour hole, and gently pulling apart the two halves where they naturally separate in the center.
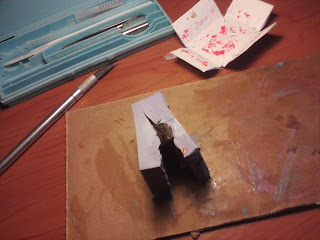
Taking the exacto knife and cleaning up the mold, in particular scooping out the entrance to the all-important pour hole.
Here I've cut out and labeled the cardboard braces for this mold. On another day we'll get to use this and actually see our completed fighter squadron!


